QueView Update Instructions: Firmware 1.3.9
2. Extract all files from ZIP into a regular folder or onto your Desktop
3. Install the virtual com port (VCP) driver for your operating system.
For Windows:
For Mac:
4. Attach programming dongle to computer using USB port and plug the header onto the controller as shown.
5. Apply power to the QueView Controller
6. Go to the following site: https://espressif.github.io/esptool-js/
**note - If using Mac, Safari is not supported
7. Click ‘Connect’ at the top of the page. A prompt will ask which COM port to use. It should look as such:

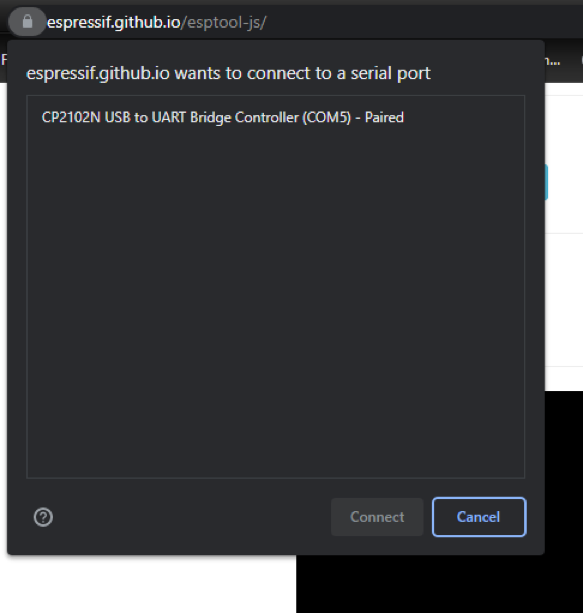
8. Ensure the COM port appears. Click on the name in the prompt. Then click ‘Connect’.
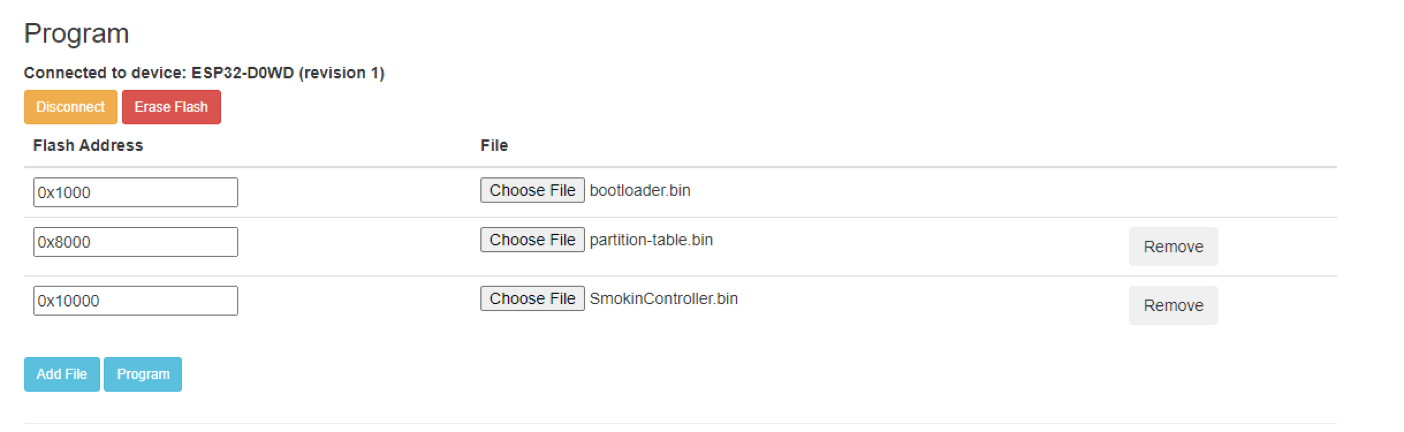
9. Once connected, fill out the boxes as shown below. You will need to click the “Add File” button twice to see the three fields. Find the files wherever you downloaded the above zip file. Ensure all three addresses and filenames match the below image.
10. Press Program. Watch the progress in the terminal. You will need to scroll to the bottom to see everything. Once you see the bottom line show “Leaving…”, you can remove power and the dongle from your QueView controller. Once the controller boots back up ensure that version 1.03.01 is now loaded.

© 2025 USI Technologies | ALL RIGHTS RESERVED